How to Measure Industrial Machines for Custom Cover Manufacturing: A Step-by-Step Guide
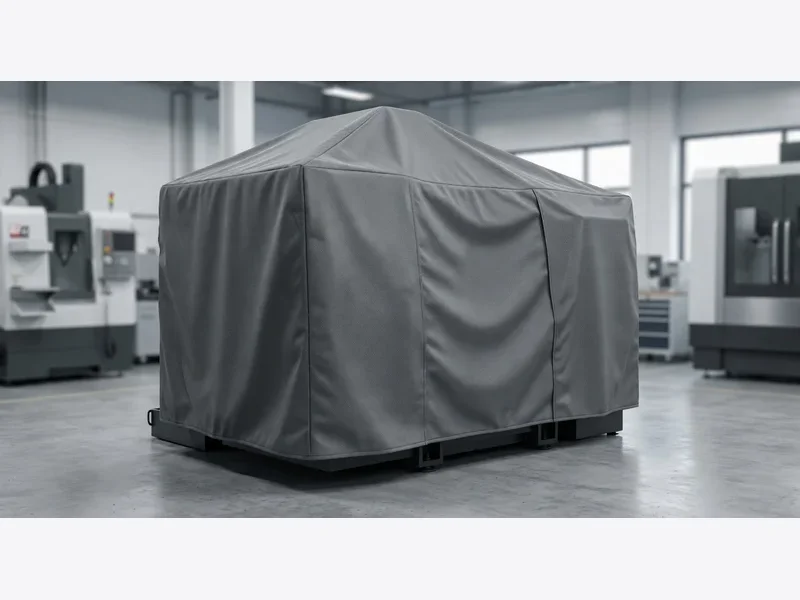
We receive measurement sets from maintenance teams and plant managers every week. Some are dimensioned CAD exports that produce a perfect cover on the first sample. Others arrive as a single number scribbled on a work order that reads "about 2 metres wide."
The difference between those two submissions is not the skill of the person measuring. It is knowing what to measure.
A custom machine cover is only as good as the dimensions behind it. When the measurements are wrong, the cover arrives too short to close at the hem, too tight to pull over a control box, or too loose to stay put in wind.
The fix is not a better factory. It is a better measurement process before the RFQ is ever sent.
This guide walks through exactly what to measure, where to measure it, and the five mistakes that we see repeat across industries and machine types. It is written for the person holding the tape measure on the shop floor.
Why Bad Measurements Cost More Than the Covers Themselves
When a cover does not fit, the cost is never just the replacement unit. The real cost cascades.
First, the machine sits unprotected for the 25 to 40 days it takes to remanufacture and ship a corrected cover. That is 600 to 960 hours of exposure to dust, coolant mist, or weather.
Second, the replacement eats into your maintenance budget. A single reorder of 50 covers at $85 per unit is $4,250 in unplanned spend.
Third, if the machine is on a production line, downtime while waiting for a cover can idle upstream and downstream processes. At $200 per hour of line downtime, a three-week gap costs $100,800.
The measurement is free. The rework is not.
We manufacture covers at our production facility, and we have seen measurement submissions that cost the buyer an extra 30 days simply because one protrusion was not documented. A single photo with a tape measure would have caught it.
The process below is designed to produce a measurement set that a factory can cut directly into a pattern with zero clarification calls.
The Tools You Need Before You Start
You need three things. All of them cost less than the freight on a replacement cover.
- A 5-metre or 8-metre steel tape measure. Do not use a cloth tailor's tape. Cloth tapes stretch by 2 to 5 mm per metre after repeated use, and the error compounds over a 3-metre machine width. A steel tape with a 19 mm blade width stays rigid enough to measure across a machine without sagging.
- A smartphone camera. Take at least five photos: one from each side, one from a 45-degree corner angle, and one close-up of any unusual feature. Include the tape measure in at least one photo per side so the pattern maker has a scale reference embedded in the image.
- A measurement worksheet. Do not rely on memory. Write down every dimension as you measure it. A simple table with columns for Location, Dimension Type (W/D/H), Measurement (cm), and Notes works. Date the worksheet and keep it with the project file.
A note on units. Always measure in centimetres. Inches introduce conversion errors at the factory stage because all pattern-making software and cutting tables in industrial textile manufacturing use metric. If your facility operates in imperial, convert at the point of submission and note the original imperial values in brackets.
Step 1: Measure the Machine Envelope (W × D × H)
The machine envelope is the smallest rectangular box that contains the entire machine. It is not the machine's chassis dimensions from the manufacturer's datasheet. It is the machine as it sits on your floor, with everything attached.
Measure three axes:
- Width (W). The widest horizontal span, measured from the outermost point on the left to the outermost point on the right. Include bolt-on accessories, junction boxes, and conduit runs.
- Depth (D). The deepest front-to-back span, measured perpendicular to the width. For machines with doors that swing open, measure with the door at its fully open position.
- Height (H). The tallest vertical span from the floor to the highest point. Include cable tracks at full vertical extension, warning light stacks, and exhaust stacks.
Each measurement should be taken twice: once at the machine body and once at the outermost protrusion. Submit both numbers, labelled clearly. For example: "Body width: 142 cm. Maximum width including control box: 158 cm."
If the machine sits on a plinth, pedestal, or raised base, note the plinth height separately. The cover hem typically sits 2 to 5 cm below the top of the plinth to prevent wind lift.
For guidance on which materials hold their shape best for larger envelope covers, see our custom machine cover material guide.
Step 2: Map Every Protrusion
This is the step that is skipped most often, and the one that causes the most remakes.
A protrusion is anything that breaks the clean rectangular envelope of the machine: handles, control panels, cable glands, lubrication ports, lifting eyes, junction boxes, air filters, and data ports.
For each protrusion, record four data points:
- Location. Which face of the machine is it on? Describe its position relative to a corner. "Left side, 32 cm from front corner, 90 cm from floor."
- Dimensions. Width × height × how far it sticks out from the machine surface. "Control panel: 28 cm W × 22 cm H, protrudes 11 cm."
- Function. Does the operator need access to it? If yes, the cover needs a flap, a clear window, or a cut-out. A control panel that is covered permanently is useless.
- Photo reference. Which photo shows this protrusion? Add a note in your worksheet: "See photo IMG_4823, red arrow."
We have received measurement sets where the machine body measured 180 cm wide, but the operator forgot to mention the 15 cm lubrication port housing on the right side. The cover was cut to 182 cm finished width. It was 13 cm too narrow. The replacement took 35 days.
Walk around the machine slowly. Touch every surface. If your hand hits something that is not flush with the main body, write it down.
Step 3: Account for Moving Parts and Clearance Zones
A static measurement of a machine at rest is only half the picture. The cover must accommodate the machine in its full range of motion.
Identify every moving component and its travel path:
- CNC gantries and bridges. Measure the gantry at both its home position and its maximum travel position. The cover must clear the highest point of the gantry arc across the full stroke length.
- Robot arms. Articulated arms can reach well beyond the base footprint. Park the arm at its maximum extension in the direction of the cover. Add 8 to 10 cm of clearance beyond that point.
- Rotary tables and indexing heads. If the table rotates and the workpiece extends beyond the machine frame, measure the swept radius. The cover must clear the largest workpiece the machine is designed to hold.
- Conveyor feeds and outfeeds. If the machine connects to a conveyor, decide whether the cover stops at the machine-conveyor interface or bridges across it. If it bridges, measure the full assembly.
A minimum of 5 cm clearance beyond the maximum extension point is our standard practice. For machines with high-speed moving parts, increase that to 10 cm to prevent the cover from being caught in the mechanism.
If the machine operates with a safety enclosure or light curtain, confirm whether the cover goes inside or outside the enclosure. This decision changes every dimension.
Step 4: Mark Ventilation and Access Requirements
A cover that seals perfectly but blocks the cooling fan will destroy the machine it is supposed to protect.
Identify and document every ventilation point, access panel, and inspection port on the machine:
- Cooling fans and exhaust vents. Mark the exact location and dimensions of every fan grille and exhaust port. These areas need either a mesh panel in the cover or a cut-out with a rain hood. Blocking a 15 cm cooling fan on a spindle motor can raise operating temperature by 15 to 25 degrees Celsius, accelerating bearing wear.
- Inspection windows and sight glasses. If the operator needs to see a pressure gauge, oil level, or coolant level without removing the cover, specify a clear PVC window at that location. Note the window's position and required size.
- Daily access points. Power switches, emergency stops, data ports, and chip trays that need daily access must have flaps or zippered openings. Specify which direction the flap should open so it does not interfere with the operator's workflow.
For every ventilation point you identify, also note the airflow direction. An exhaust vent blows hot air out. A blocked exhaust vent turns the inside of the cover into an oven. An intake vent draws cool air in. A blocked intake starves the cooling system.
For covers used in environments with airborne contaminants, the material choice matters as much as the vent placement. Our PVC vs PU vs PE material comparison guide covers which coatings handle chemical exposure without degrading.
The 5 Most Common Measurement Mistakes
These are the errors we see repeat regardless of industry, machine type, or country of origin. Each one has a simple fix.
| Mistake | What Happens | The Fix |
|---|---|---|
| 1. Forgetting protrusions | Cover will not close. The protrusion pushes the fabric out, creating a gap at the hem or splitting a seam. | Walk around the machine twice. The first pass is for the body. The second pass is only for things that stick out. Photograph everything. |
| 2. Ignoring moving parts | Cover fits at rest but catches or tears when the machine cycles. A torn cover on a moving gantry can pull into the mechanism. | Cycle the machine through its full range before measuring. Measure at both extremes. Add clearance. |
| 3. Blocking ventilation | Machine overheats. Thermal cycling accelerates bearing and seal wear. In extreme cases, control electronics fault. | Mark every vent on the worksheet before measuring anything else. These are non-negotiable openings. |
| 4. Using datasheet dimensions | Datasheets list the machine chassis. They exclude aftermarket accessories, cable runs, and modifications. The cover fits the chassis but not the machine. | Always measure the actual machine on your floor. Use the datasheet only as a cross-check. |
| 5. No photos with scale reference | The pattern maker cannot verify your numbers against reality. An ambiguous protrusion description becomes a guess. | At least one photo per machine face with a tape measure visible. Write the dimension on a piece of paper and hold it in the photo next to the feature. |
Notice a pattern. Four out of five mistakes are not about measuring wrong. They are about not measuring at all. The tape measure is accurate. The omissions are what cost you.
For a broader look at how measurement accuracy feeds into overall cover selection, read our guide on how to choose custom machine covers.
How to Submit Measurements That Get a Quote in 24 Hours
A complete measurement submission has five parts. When all five arrive together, the factory can generate a pattern, calculate material consumption, and return a firm quote without a single clarification email.
- Dimensioned sketch or worksheet. A simple line drawing with W × D × H labelled is enough. Hand-drawn is fine. The sketch must show the machine from at least two orthogonal views, with every protrusion dimensioned. PDF or clear photo of the sketch.
- Protrusion list. A numbered table with location, dimensions, and function for each protrusion. Cross-reference to the sketch and the photos.
- Ventilation and access map. Mark every vent, panel, and access point on the sketch. Note airflow direction.
- Photos (5 minimum). Front, back, left, right, and a corner angle. Include the tape measure in at least one photo per side. Hold a note with the dimension next to the feature.
- Environmental notes. Indoor or outdoor? Exposure to coolant mist, cutting oil, UV, or chemical vapours? Operating temperature range? These determine material selection and are part of the measurement package, not a separate conversation.
A submission with all five parts typically turns into a quote within one business day. A submission with only the envelope dimensions and one photo triggers a round of questions that adds three to five days to the timeline.
The measurement process described here takes 20 to 30 minutes per machine. Compare that to the cost of a remake: 25 to 40 days of lead time, the unit cost of the replacement covers, and the unprotected machine hours in between.
Thirty minutes at the tape measure buys you certainty on delivery day.
Ready to Submit Your Machine Measurements?
Send us your dimensioned sketch, photos, and environmental notes. We return a firm quote with material recommendations within 24 hours, plus a pattern preview before cutting begins.
Submit Measurements for Quote →Frequently Asked Questions
What measurements do I need to send for a custom machine cover quote?
You need the machine envelope dimensions (width, depth, height measured at the outermost points), a list of every protrusion with its location and dimensions, clearance requirements for any moving parts, and the locations of ventilation grilles or access panels that must not be covered.
Include 5 photos of the machine from different angles with a tape measure visible in at least one shot for scale reference. A complete submission turns into a firm quote within 24 hours.
What is the most common measurement mistake that ruins a custom cover fit?
Forgetting protrusions. Handles, control boxes, cable glands, and lubrication ports that stick out from the machine body are missed in roughly 40% of the measurement sets we receive.
If the cover is cut to the main body dimensions and a handle sticks out 8 cm, the cover will not close. Walk around the machine twice: once for the body, once for anything that protrudes.
How much clearance should I add for moving parts?
Add the full range of motion to your envelope dimensions. For a CNC machine with a gantry that travels 120 cm on the Y-axis, the cover depth must accommodate the gantry at both its home and fully extended positions.
For articulated robot arms, measure the machine with the arm at its maximum reach. Standard practice is a minimum of 5 cm additional clearance beyond the maximum extension point.
Can I use the machine manufacturer's datasheet dimensions instead of measuring?
No. Datasheets list the machine chassis dimensions. They exclude aftermarket accessories, cable runs, modifications, and installations added after delivery.
A cover built to datasheet dimensions will fit the chassis but not the machine as it sits on your floor. Always measure the actual installed machine. Use the datasheet only as a cross-check.
Why do you need photos if I already sent the dimensions?
Photos give the pattern maker visual confirmation of geometry that numbers alone cannot convey. A tapered machine body, an offset control panel, or a cable run routed across a corner are easier to see than to describe.
Photos also serve as an audit record. If the cover arrives and something is off, the photos provide a baseline for root-cause analysis: was the measurement wrong, or was the pattern wrong?
Frequently Asked Questions
Who is this for?
Plant managers, maintenance teams, and procurement professionals who need to submit machine measurements for custom protective cover manufacturing.
How long does measuring take?
Twenty to thirty minutes per machine for a complete measurement set including photos. Complex machines with multiple protrusions and moving parts may take 45 minutes.
What if my machine has an irregular shape?
Submit photos from all angles plus a dimensioned sketch showing the shape. For complex geometry, a short video walkaround with the tape measure visible helps the pattern maker understand compound curves and tapers.
Can you measure the machine for me?
We manufacture covers from dimensions you provide. If on-site measurement is needed, we can recommend third-party inspection services in your region. Contact us to discuss.
What tolerance do you build into the cover?
Standard finished tolerance is ±1 cm on dimensions up to 200 cm, ±0.5% above 200 cm. For fitted covers with elastic hems or drawstrings, we tighten to ±0.5 cm on the closure perimeter.
What happens if the cover doesn't fit?
If the cover was manufactured to your submitted dimensions and those dimensions were incorrect, a remake is required. If the cover was manufactured incorrectly against the submitted dimensions, we remake it at our cost. This is why we ask for photos with scale reference: they provide an objective record of what was measured.